In this lesson, we will talk about the design process. In my experience as a designer, I’ve found that having a structured process is crucial for success. Throughout this playbook, I’ve emphasized the importance of having a well-organized font and image collection, which has significantly streamlined my workflow. However, design isn’t just about creating a visually appealing end product; it’s a multifaceted process that begins with understanding the client’s needs through a creative brief. From there, it will involve brainstorming strategies to address those needs, followed by the actual design phase. Afterward, the design undergoes a thorough quality check, and if no errors are found, it is delivered to the client. If revisions are needed, the process loops back to understanding the necessary changes and implementing them.
Achieving great design involves numerous steps, but having a reliable process in place can you and your students create great designs. Because this process is not linear but rather loops back to any of the previous steps, it allows for valuable input from your team, fostering collaboration and effective communication skills.
The Design Process
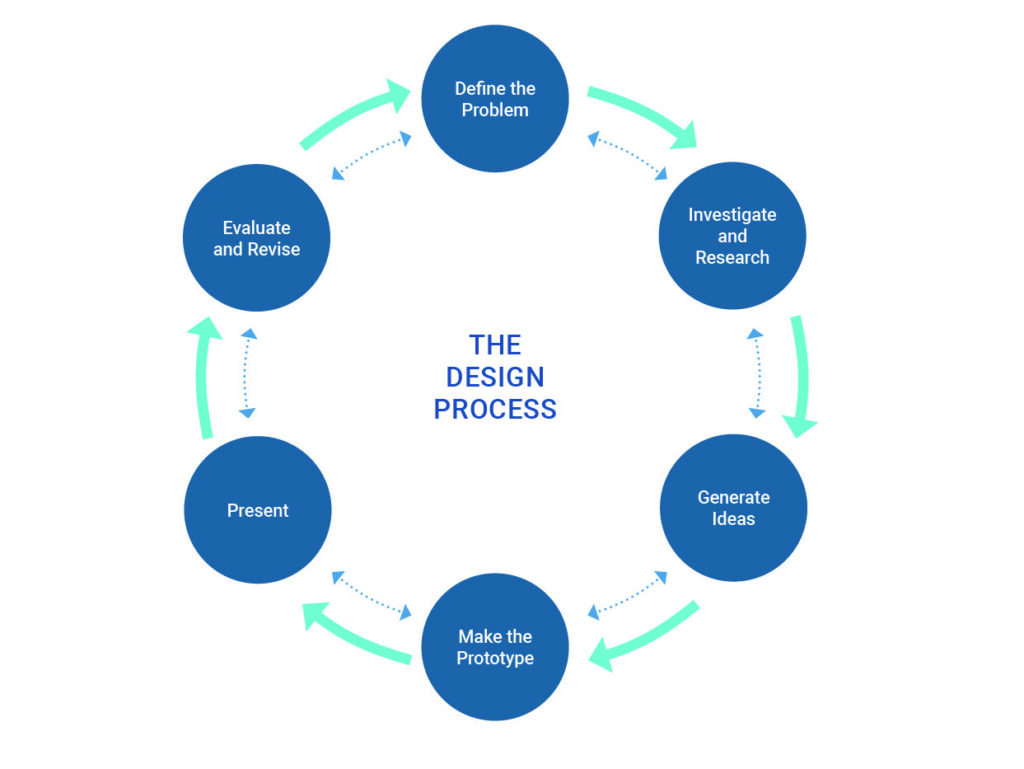
Here’s my approach to the design process based on my experience as a designer:
- Define the Problem: Every design project begins with a creative brief or a set of instructions outlining the project’s objectives and requirements.
- Investigate and Research: This phase involves ensuring that the instructions are clear and that all necessary materials are available. If not, you will need to identify where to source them. Depending on the design project, this can also involve researching the brand, target market and
- Generate Ideas: This stage involves brainstorming ideas and creating sketches or comprehensive studies of potential designs. If you are working with a team, this is the part where you can brainstorm and collaborate.
- Make the Prototype: This is where the actual design work takes place, bringing the chosen idea to life.
- Present: When you have completed your design, it’s time to submit it to the client or present it to your team for quality check. However, before doing so, make sure to go through your work and self-check for any errors.
- Evaluate and Revise: If revisions are needed, evaluate how to correct or improve the design and proceed with revisions.
The process may cycle back to any stage depending on the extent of revisions required. Major revisions may involve returning to the problem-defining stage. For minor revisions, it may simply require going back to the design stage before progressing to the next steps until the project is completed.
Source: The Design Process in the Art Classroom: Building Problem-Solving Skills for Life and Careers by Robin Vande Zande, Lauren Warnock, Barbara Nikoomanesh & Kurt Van Dexter (2014) The Design Process in the Art Classroom: Building Problem-Solving Skills for Life and Careers, Art Education, 67:6, 20-27, DOI: 10.1080/00043125.2014.11519294
Other helpful references
- Read this blog to learn more about The design process and 5 reasons why it matters
- Read What Does a Graphic Designer’s Process Look Like?
Leave a Reply
You must be logged in to post a comment.